My Latest Project
Posted: Wed Apr 23, 2008 10:43 pm
So, with a few successful designs/executions under my belt here recently, I garnered the confidence to tackle a more advanced valve.
I wanted something sleek and professional looking. I started designig and building one, but it was a mish-mash of threaded adapters and parts and, well, it just didn't look sleek or professional. I did quite a bit of research and came up with this design.
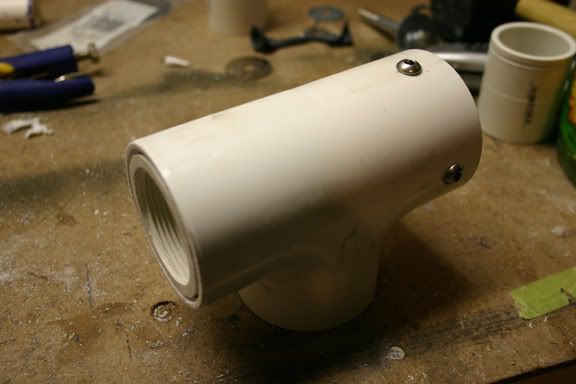
This is my 1.5" porting piston in a 2" tee. Though this might seem like a pretty simple valve to some of you, this was probably the most involved component I've built yet. The piston itself is another 2" sanding drum (they just work so damn well) with a couple neoprene washers as a sealing face.
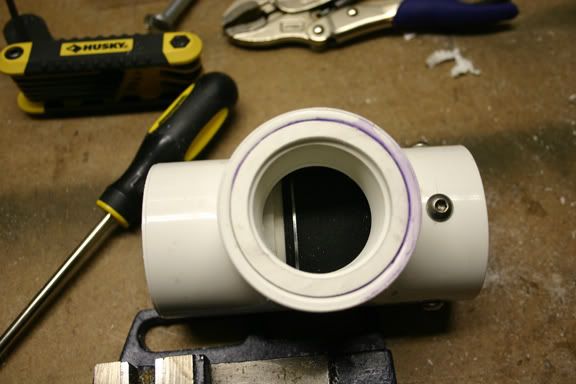
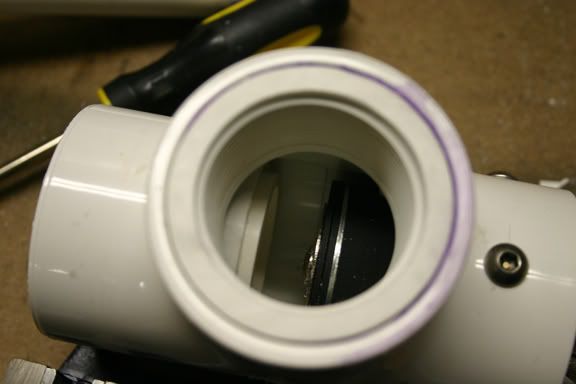
The barrel/chamber ports are fitted with 2" x 1.5" threaded hex bushing that have had the "hex" ground away. I also trimmed down the bottom to make them flush.
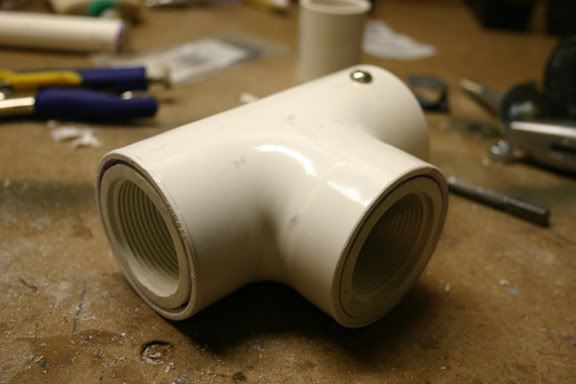
The barrel port was difficult. I wanted the threads to be completely concealed. However, connecting a small length of 1.5" pvc (for the piston to seal against) was proving problematic. I discovered (by accident) that a 1.5" male thread adapter fits nicely inside the lip that prevents the pipe from passing through the tee. I chopped the threaded portion off, popped in a short length of 1.5", and epoxied it in place directly behind the barrel port bushing.
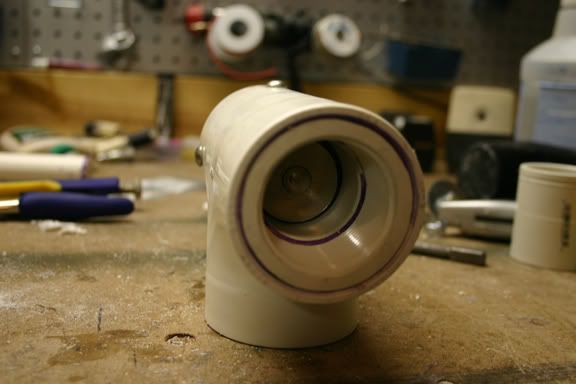

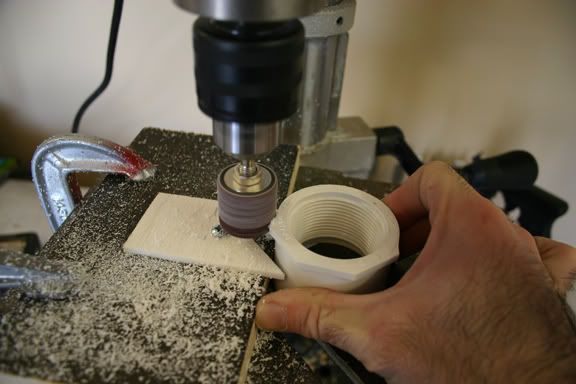
The back end required a little extra work as well. I made a sort of jig for my drill press and used a sanding drum (handy little things) to sand about an inch of the lip out of the pilot side of the tee. This let me insert a short length of 2" pvc into the housing followed by a plug (again, trimmed to fit flush) to give the piston about an extra inch of forward travel. This allows me to position the sealing face further forward in the barrel, which, admittedly, may or may not be beneficial. The extra "sleeve" actually protruded forward past the chamber port, so I trimmed it down as to not obscure it. A handful of 1/4" screws and a 1/2" threaded port on the back to round it out.
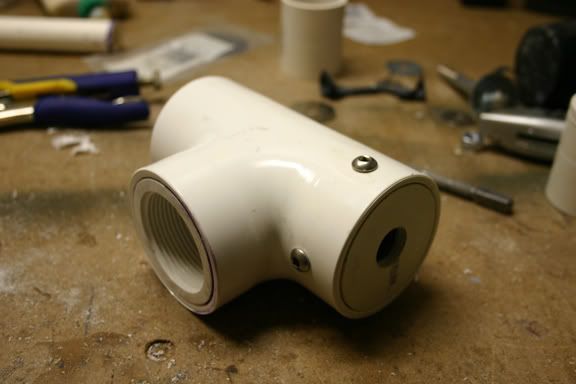
Its not finished yet, I still have to seal up the back end. I'm guessing an o-ring would be the easiest route, but I'm having a hard time finding one thats the right size. I'm also not sure of my bumper which is a rubber gasket intended for a flapper valve. Its has an outer diameter of 2" and is about 1/4" thick and sits perfectly in the back of the pilot area. There is also currently a spring behind the piston. Any thoughts on that set-up will be greatly appreciated.
So, why did I post an unfinished piston? Well, I'm proud of it. If nothing else, I feel that it looks the part. But, also, I'm looking for creative criticism. If this one works as well as I'd like it to, I'd like to build another one just like it for a dual chambered golf ball cannon. So, whataya think so far?
I wanted something sleek and professional looking. I started designig and building one, but it was a mish-mash of threaded adapters and parts and, well, it just didn't look sleek or professional. I did quite a bit of research and came up with this design.

This is my 1.5" porting piston in a 2" tee. Though this might seem like a pretty simple valve to some of you, this was probably the most involved component I've built yet. The piston itself is another 2" sanding drum (they just work so damn well) with a couple neoprene washers as a sealing face.


The barrel/chamber ports are fitted with 2" x 1.5" threaded hex bushing that have had the "hex" ground away. I also trimmed down the bottom to make them flush.

The barrel port was difficult. I wanted the threads to be completely concealed. However, connecting a small length of 1.5" pvc (for the piston to seal against) was proving problematic. I discovered (by accident) that a 1.5" male thread adapter fits nicely inside the lip that prevents the pipe from passing through the tee. I chopped the threaded portion off, popped in a short length of 1.5", and epoxied it in place directly behind the barrel port bushing.


The back end required a little extra work as well. I made a sort of jig for my drill press and used a sanding drum (handy little things) to sand about an inch of the lip out of the pilot side of the tee. This let me insert a short length of 2" pvc into the housing followed by a plug (again, trimmed to fit flush) to give the piston about an extra inch of forward travel. This allows me to position the sealing face further forward in the barrel, which, admittedly, may or may not be beneficial. The extra "sleeve" actually protruded forward past the chamber port, so I trimmed it down as to not obscure it. A handful of 1/4" screws and a 1/2" threaded port on the back to round it out.

Its not finished yet, I still have to seal up the back end. I'm guessing an o-ring would be the easiest route, but I'm having a hard time finding one thats the right size. I'm also not sure of my bumper which is a rubber gasket intended for a flapper valve. Its has an outer diameter of 2" and is about 1/4" thick and sits perfectly in the back of the pilot area. There is also currently a spring behind the piston. Any thoughts on that set-up will be greatly appreciated.
So, why did I post an unfinished piston? Well, I'm proud of it. If nothing else, I feel that it looks the part. But, also, I'm looking for creative criticism. If this one works as well as I'd like it to, I'd like to build another one just like it for a dual chambered golf ball cannon. So, whataya think so far?
