You want to make a wood stock huh, well here’s what you do:
Go to the wall-mart and get your self a half round rasp, that’ll go through wood like a knife through butter.
Well your there pick yourself up a good knife, I recommend a buck 110.
You’ll also need some wood glue an a few C-clamps
Now, for the wood, go to you local lumber yard and pick up enough sheets of hardwood B/C plywood to make a stake thick enough to do what you want.
Lay out your design on a sheet of plywood with the best side out, cut out the design and then trace it on to the next peace, do that until you got all your layers cut.
Now, if you want/need to do any inletting cut out from the pieces of plywood that would go in the middle were the inletting needs to be.
After all the cutting’s done you should end up with a stack of plywood the resembles the silhouette of the stock you want, it should also farley well to the rest of the gun, if not go back and do some more inletting.
Glue the stack together with a liberal amount of wood glue and clamp it down good and tight, depending on the size of your stock you’ll need anywhere from 2 to 4 clamps.
Once the glue is dried take off the clamps, it time to shape it.
Take the rasp and rough out the shape you want starting with the coarse end and finishing with the fine end. Then take your knife and clear out any glue from, and finish the inletting.
Your done save for a bit of paint or stain.
Any questions, if you need more detail I’ll have to ask my dad, he’s good at this type thing.
building stock for gun
-
judgment_arms

- Sergeant 3

- Posts: 1272
- Joined: Tue Oct 17, 2006 8:49 pm
- Location: Not so beautiful North Carolina, but at least it’s the U.S.A.!


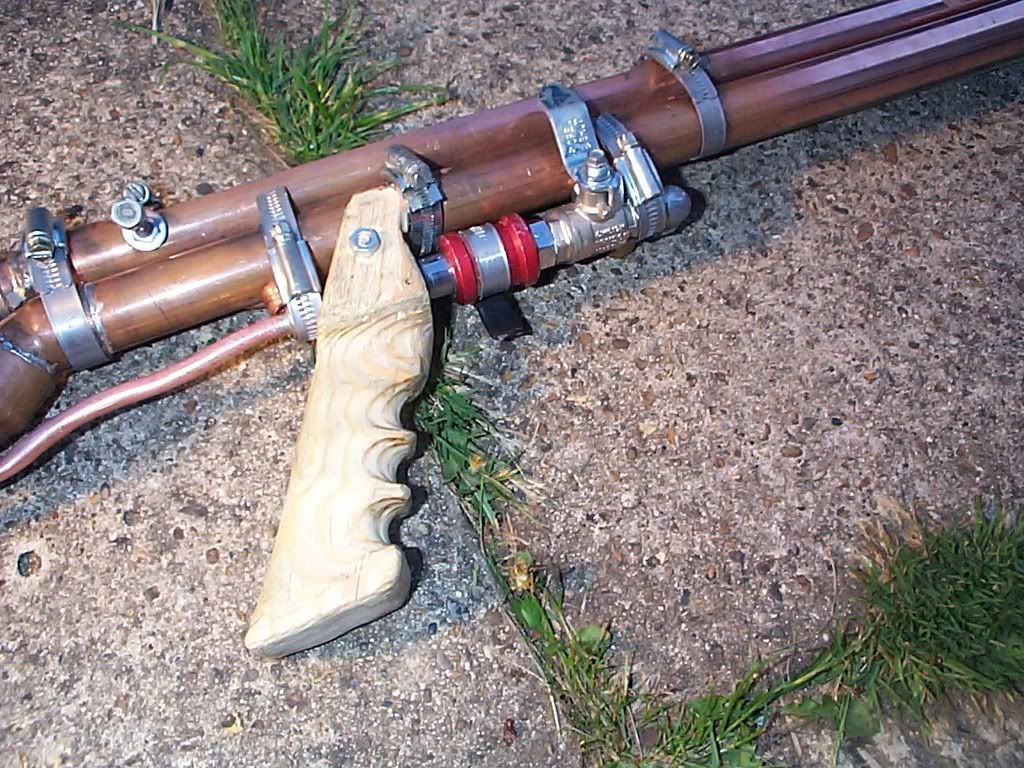
Thanks a lot I'll try that. I made a silencer, laser holder, adn flash light holder so it is looking alot better.
-
judgment_arms
- Sergeant 3
- Posts: 1272
- Joined: Tue Oct 17, 2006 8:49 pm
- Location: Not so beautiful North Carolina, but at least it’s the U.S.A.!
If you need any help just shoot me an e-mail or a PM.


Judge's suggestion sounds a good enough method, but I'd suggest picking up a couple of grades of glass/sand paper (Perhaps 80 for starting off, and a finer grain for later on, but don't jump too much - maybe 120 or 160?) while at the store to smooth it down at the very end.
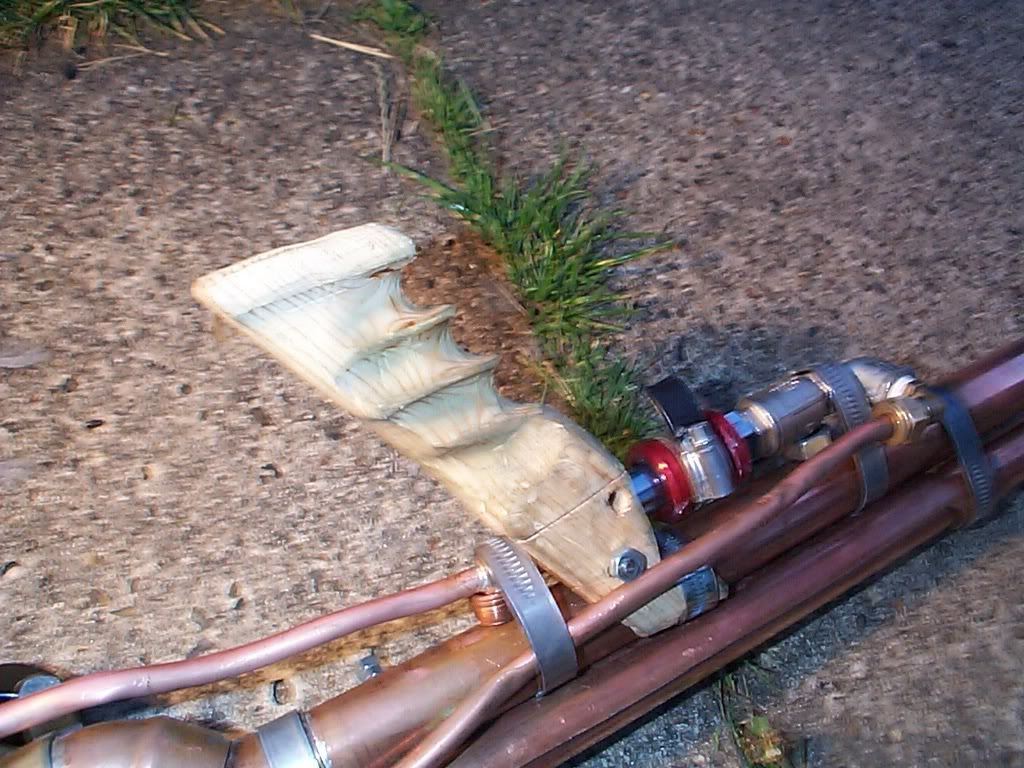
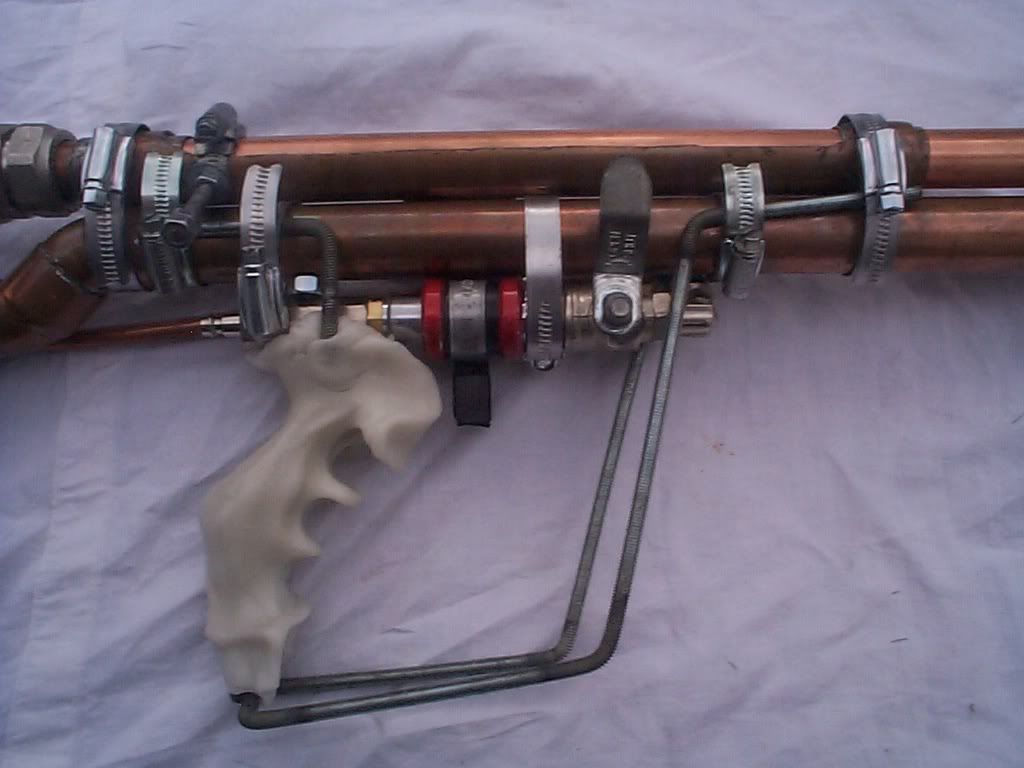
Of course, I'm not great on woodwork, but it was useful enough to have some around for smoothing when I did a wooden pistol grip:
Here and Here
It has since been replaced because it wasn't quite solid enough - surprisingly for what is quite a small launcher, it was damaged by recoil of all things, but I was being a little "inventive" with how I was holding it (read: fairly heavy projectile, fired one handed at 300 psi. Not very safe, but fun.) - but certainly looked pretty good.
Does that thing kinda look like a big cat to you?
-
judgment_arms
- Sergeant 3
- Posts: 1272
- Joined: Tue Oct 17, 2006 8:49 pm
- Location: Not so beautiful North Carolina, but at least it’s the U.S.A.!
Most half round rasps have a smooth(ish) side so you’ll only need 150grit and 220, if you want somthin’ really purty go all the way down to 400 grit and put a coat of Min-wax on it then a coat of high-gloss tung oil.

Ooooo... that baby would be as smooth as silk with the tung oil....
feel good on the hands (or in this case...shoulder).
feel good on the hands (or in this case...shoulder).
Forum Rules - follow them or else!
“Happiness is the meaning and the purpose of life, the whole aim and end of human existence”
“Happiness is the meaning and the purpose of life, the whole aim and end of human existence”
I am thinking about making a front grip too. you reccommended plywood but wouldn't that crack and come apart. shouldn't I get regular solid wood?
two words my friend....pat123 wrote:I am thinking about making a front grip too. you reccommended plywood but wouldn't that crack and come apart. shouldn't I get regular solid wood?
"Liquid Nails"
Forum Rules - follow them or else!
“Happiness is the meaning and the purpose of life, the whole aim and end of human existence”
“Happiness is the meaning and the purpose of life, the whole aim and end of human existence”
-
THUNDERLORD
- Sergeant 3
- Posts: 1264
- Joined: Fri Mar 28, 2008 1:42 pm
Do you want a rifle stock or a pistol stock?
BTW, looks like a nice gun it's going on. looks sturdy, but heavy.
If you build a wood stock with just your saw, you will still have to attach it somehow. So for a pistol grip I would recomend this:
1-Get some flat rectangular piece of scrap metal. two 1/4 or 3/8 bolts about 4.5 or 5" and four nuts, some electrical tape and two large hose clamps
2-Drill two holes 1/4 or 3/8" is better in it along one in front one in back about 1.5" apart.
3- Get two long bolts the length of a little longer than the palm of your hand.and pick up about four nuts that fit them. put the bolts through the holes in the rectangular piece and thread the nuts all the way up the bolts to tighten them against the metal piece.
4-Wrap electrical tape around and round the two bolts and put another smaller rectangular piece with two holes om the bottom and two more nuts two hold it on. and tighten it a little.
5-Put the two hose clamps one in front one in back of the rectangular piece.
while your at it put two hose clamps around that propane tank to sturdy it up.
You could put foam rubber over top or a bicycle grip.
I suppose you could make the front grip the same way or just order a thompson submachine gun grip for like $30 bucks somewhere and hose clamp it on front!!!
EDIT: If you use 1/4" it won't be sturdy but I'm not sure what size bits you have. also use thick metal for the rectangular piece. and if you don't have any hose clamps you could make something similar and maybe better.
-
judgment_arms
- Sergeant 3
- Posts: 1272
- Joined: Tue Oct 17, 2006 8:49 pm
- Location: Not so beautiful North Carolina, but at least it’s the U.S.A.!
Actually it’s stronger than a solid board, unless said board was hickory…pat123 wrote:I am thinking about making a front grip too. you reccommended plywood but wouldn't that crack and come apart. shouldn't I get regular solid wood?


Or of you're any good at all with fibreglass you could make a fibre-glass foam-cored stock.
For that you obviously need fibreglass, and resin and then some closed cell foam insulation board. I have no idea what sizes you guys have over there but here we have 50mm (2 inch thick) which comes in sheets up to 8' x 4' !!
You then need to trace your shape out onto this twice, cut out the two a carving knife works well for this (but a hot knife is better) and then shape the seat for your gun. Once you've done that bond the two sheets together like a sandwich with the appropriate glue (the guys who sell you the foam will know) and then sand it to shape. It sands well with sand paper, but also a stiff wire brush can work well to get the initial shape in place. Then you cover the whole lot in various sheets of fibreglass and resin (again ask the guys which resin to use on the board you have).
For something which sounds flimsy it can be surprisingly strong - I've made air rifle stocks like this and they've lasted years. And the great thing is it's quick and can be cheap.
<A HREF="http://www.paisleypeking.co.uk"><IMG BORDER="0" WIDTH="400" HEIGHT="64" SRC="http://www.paisleypeking.co.uk/images/s ... e.gif"></A>