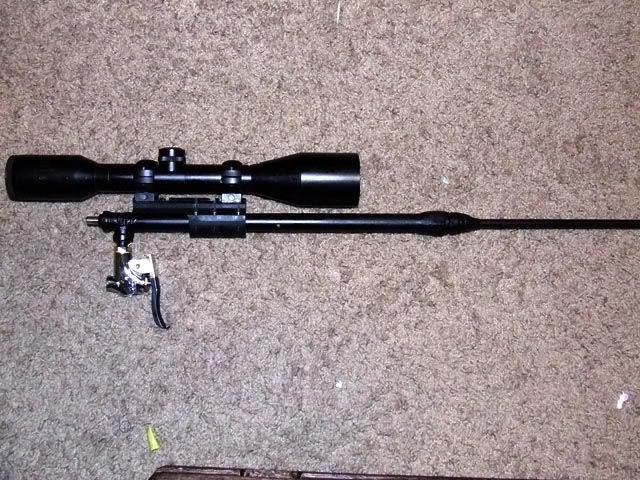
Pneumatic wood-stock Rifle Build Log
- VH_man
- Staff Sergeant 4
- Posts: 1827
- Joined: Sat Dec 09, 2006 6:00 pm
- Location: New Hampshire
- Been thanked: 1 time
Well, I have embarked on another journey to yet another cannon, and because I now have a camera almost all to myself, I thought I would put this up here, seeing as I am spending lots of time waiting for my epoxy to dry.
Basically, I have found that my .177 Stick Gun has become one of my favorite Launchers. It is easy to fill, Easy to load, Easy to fire, and after firing through almost 5000 rounds has not even had a misfire.
I am basically constructing a new version of this cannon, but in a far more controlled matter. It is currently day 5 of my construction and you can see how far I have gotten. and now, "Where I am Now", A pictography:
The Parts Layout (bad Picture... sorry)
Barrel Support. This was constructed by moulding an epoxy "ring" and then chopping it down into two rounded sections, of which I then superglued back onto the barrelstock.
Piston. Instead of a Direct Moulding, I like to decrease the friction inside the piston area by making my piston out of brass tubing filled with epoxy. The piston will be polished before final insertion as to decrease friction even more.
Sealing Face. I have placed it inside the brass tubing to help protect against peeling due to the high velocity air blowing by it in the cannon. This piece of rubber is temporary, I am precision punching out a better piece that will fit perfectly in the tube.
From here, I have alot of work to do. I literally just poured the barrel end of the finalized cannon, and I am waiting for that to dry before I start my next set of experiments. My general Idea for this cannon is to end up looking as close to a muzzleloader as possible. I have a very nice piece of walnut that I am currently roughing out into a nice thumbhole stock, and I need some way of piloting and filling the cannon without removing it from the stock. I want the firing to be trigger-like, and the fill to preferably be at the very back of the cannon, in the form of a Schrader.
So basically, What would you all recommend for piloting this thing rifle-trigger style? And any suggestions on mounting the "cannon" to the stock firmly?
Last edited by VH_man on Wed Nov 25, 2009 9:17 pm, edited 2 times in total.
You may want to crop the picture to eliminate the name an age!
Looks good so far!
Looks good so far!
A strong way to mount the "cannon" to the stock is by soldering a some nuts to the underside of the cannon then drilling holes through the stock so you can put bolts through the underside of the stock and screw them into the cannon. This is very similar to the way my airsoft rifle is held together.
Clean and removable system.
- jackssmirkingrevenge
- Five Star General
- Posts: 26203
- Joined: Thu Mar 15, 2007 11:28 pm
- Has thanked: 569 times
- Been thanked: 345 times
Bienvenido a mi mundoVH_man wrote:I am spending lots of time waiting for my epoxy to dry.
I think jook13 had the right idea, in terms of piloting and mounting.So basically, What would you all recommend for piloting this thing rifle-trigger style? And any suggestions on mounting the "cannon" to the stock firmly?
hectmarr wrote:You have to make many weapons, because this field is long and short life
@JSR:
¿Desde cuando habla Ud. español?
¿Está Ud. viviendo en españa?
@VH:
Actually, hose clamps can make an excellent temporary connection, at least, while you're testing the gun.
¿Desde cuando habla Ud. español?
¿Está Ud. viviendo en españa?
@VH:
Actually, hose clamps can make an excellent temporary connection, at least, while you're testing the gun.
ilovetoblowthingsup wrote: The yellow/orange back fits super snugly, very nice in fact, but the head does not fit.
- jackssmirkingrevenge
- Five Star General
- Posts: 26203
- Joined: Thu Mar 15, 2007 11:28 pm
- Has thanked: 569 times
- Been thanked: 345 times
Trabajo con una empresa española hace varios años, y como ellos no hablan ingles, tenia que aprender la idiomaroboman wrote:¿Desde cuando habla Ud. español?
hectmarr wrote:You have to make many weapons, because this field is long and short life
- Mr.Sandman
- Corporal 3
- Posts: 762
- Joined: Fri Mar 28, 2008 9:10 am
- Contact:
Creo que nadie presta atención a mi firma. Lo que sea, no necesito a todos ustedes. Btw vosotros is for coños! ha hajackssmirkingrevenge wrote:Trabajo con una empresa española hace varios años, y como ellos no hablan ingles, tenia que aprender la idiomaroboman wrote:¿Desde cuando habla Ud. español?
Yeah, it's that important.
- Brian the brain
- Moderator
- Posts: 3497
- Joined: Mon Dec 05, 2005 2:06 am
- Location: Holland
- Been thanked: 6 times
¿por qué estamos discutiendo este sentido no en español?
Gun Freak wrote:
Oh my friggin god stop being so awesome, that thing is pure kick ass. Most innovative and creative pneumatic that the files have ever come by!
Can't ask for a better compliment!!
Oh my friggin god stop being so awesome, that thing is pure kick ass. Most innovative and creative pneumatic that the files have ever come by!
Can't ask for a better compliment!!
muy bien! espanol! mi es muy mal en la espanol.... ingles FTW!
BTB: por que no?
BTB: por que no?
- Mr.Sandman
- Corporal 3
- Posts: 762
- Joined: Fri Mar 28, 2008 9:10 am
- Contact:
Lol that sentence was horrible. It says my is bad in the spanish. You could have at least used a translator lol. anyways, any updates on the gun vh man?rp181 wrote:muy bien! espanol! mi es muy mal en la espanol.... ingles FTW!
BTB: por que no?
Yeah, it's that important.
- VH_man
- Staff Sergeant 4
- Posts: 1827
- Joined: Sat Dec 09, 2006 6:00 pm
- Location: New Hampshire
- Been thanked: 1 time
Well, I'm at my uncles house celebrating turkey day, so as of now I have no further developments. but I do have another question:
I attached the sealing face to my piston last night, and it doesn't seal 100% when I blow in the back of the cannon (a little bit of air leaks out of the barrel). Will this go away at higher pressures or should I re-mould my piston?
epoxy cured perfectly on the top piece. I discovered that clear spray-on plasti-dip will function perfectly as a method for stopping the discoloring of copper and add a very nice aspect of "rough" to the barrel part, which will end up having a nice effect.
As for attaching the "cannon" to the stock, I think I am going to hammer out some sort of brass "clamp" that I can bolt down in 4 places inconspicuously.
-
- First Sergeant 3
- Posts: 2400
- Joined: Wed Oct 18, 2006 11:12 pm
- Has thanked: 2 times
- Been thanked: 10 times
Lorem ipsum dolor sit amet, consectetur adipiscing elit. Cras nec placerat erat. Vivamus dapibus egestas nunc, at eleifend neque. Suspendisse potenti. Sed dictum lacus eu nisl pretium vehicula. Ut faucibus hendrerit nisi. Integer ultricies orci eu ultrices malesuada. Fusce id mauris risus. Suspendisse finibus ligula et nisl rutrum efficitur. Vestibulum posuere erat pellentesque ornare venenatis. Integer commodo fermentum tortor in pharetra. Proin scelerisque consectetur posuere. Vestibulum molestie augue ac nibh feugiat scelerisque. Sed aliquet a nunc in mattis.
Last edited by SpudBlaster15 on Wed Jul 14, 2021 7:18 pm, edited 1 time in total.
darn my high school spanish 2 class.... they dont teach us anything...
I made a EFFORT!
as for the gun, looks like a clean build...
I made a EFFORT!
as for the gun, looks like a clean build...